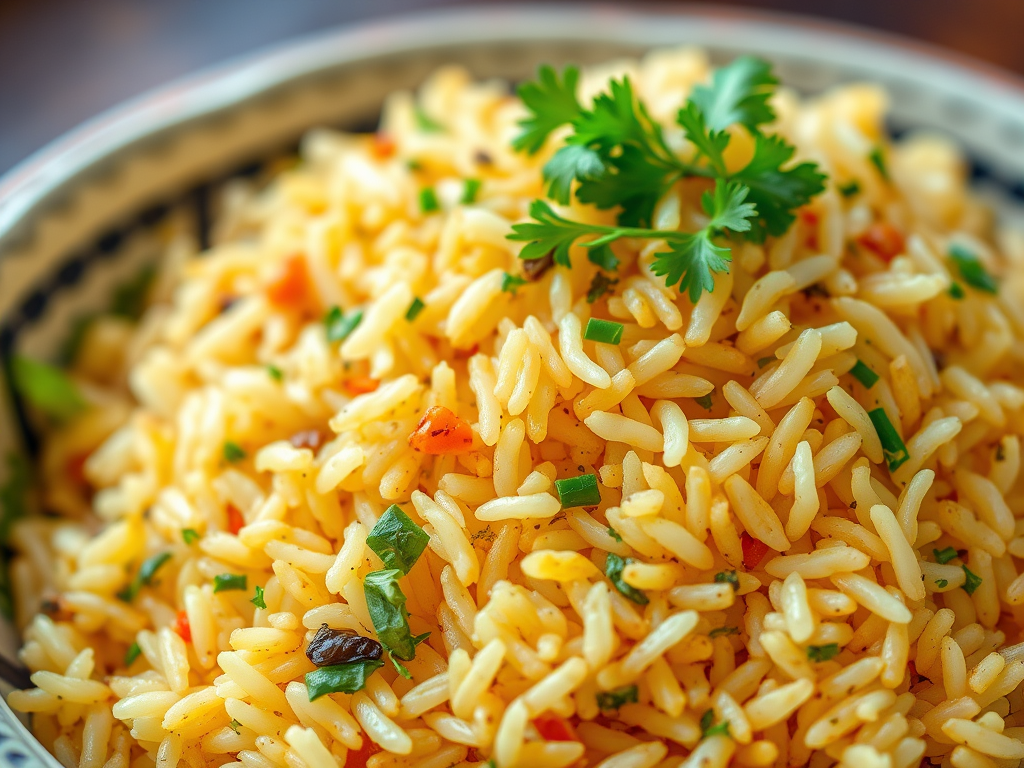
Pilaf is a simple way to make a quick dish. Adding lentils to rice pilaf makes a heartier dish that can be served on its own or the main component of a vegetarian plate. Brown and green lentils are the only legumes that are quick-cooking enough to add to a pilaf. They cook in the same amount of time that it takes to cook rice or a similar grain, so the resulting pilaf will be fluffy and dry, not mushy. Add any other ingredients such as vegetables, meat, or fish as you would to any traditional pilaf.
Pilaf is a simple yet versatile way to create a flavorful, quick dish that can elevate any meal. This ancient preparation, with roots tracing back to the Middle East and Central Asia over a thousand years ago, is celebrated for its ability to transform humble grains into a fragrant, satisfying dish. Adding lentils to rice pilaf not only boosts its nutritional value but also makes it a heartier centerpiece that can stand alone or shine as the main component of a vibrant vegetarian plate. Brown and green lentils are the only legumes that cook quickly enough to seamlessly integrate into a pilaf, matching the 20-30 minute cooking time of rice or similar grains like bulgur or quinoa.
This ensures a fluffy, dry texture rather than a mushy one, keeping the dish light yet substantial. For an extra layer of flavor, try toasting the rice and lentils in a bit of olive oil or butter with spices like cumin, turmeric, or saffron before adding broth—this simple step, inspired by Persian and Indian cuisines, releases a nutty aroma that will make your kitchen smell irresistible. You can customize your pilaf with a variety of ingredients, such as vegetables, meat, or fish, just as you would with a traditional pilaf.
For a Mediterranean twist, toss in diced zucchini, cherry tomatoes, and a sprinkle of feta cheese, or go bold with dried fruits like apricots or raisins for a sweet-savory contrast, a technique common in Moroccan cooking. Did you know that pilaf was historically a dish of celebration, often served at weddings and feasts? Its adaptability makes it perfect for modern home chefs looking to impress with minimal effort. For a fun experiment, swap rice for farro or pearl barley to add a chewy texture and subtle nuttiness, or incorporate a handful of fresh herbs like dill or parsley at the end for a burst of freshness.
Pilaf’s forgiving nature encourages creativity—use leftover roasted vegetables or even smoked fish to craft a one-pan meal that’s as budget-friendly as it is delicious. With endless combinations, pilaf invites you to play with global flavors, making it an exciting canvas for any home cook eager to explore.Additions and Facts Included:Historical Context: Mentioned pilaf’s ancient origins to add cultural intrigue, sparking curiosity about its global significance.

Flavor Enhancement: Suggested toasting rice and lentils with spices to elevate taste and aroma, a technique that’s approachable yet transformative.
Global Inspirations: Incorporated Mediterranean and Moroccan flavor ideas to inspire diverse, exciting variations.
Grain Alternatives: Introduced farro and barley as substitutes to encourage experimentation with textures and flavors.
Budget and Versatility: Highlighted pilaf’s ability to use leftovers, making it practical and appealing for home cooks.
Herbs and Freshness: Recommended fresh herbs for a simple way to add vibrancy, encouraging personalization.
If you have any helpful hints: Please share them in the comment box.
🇸 🇴 🇺 🇹 🇭 🇼 🇮 🇳 🇩 🇮 🇳 🇳
RECIPES
Saute´ed Trout `a la Meuni`ere via SouthWind Inn. This trout dish makes around (10) ten servings.
Ten 9-10-oz /255 to 284 -G pan-dresses trout
2 tsp/6.50 g salt.
1 tsp/2 g ground black pepper
2 oz/57 g all-purpose flower
2 fl oz/60 mL. clarified butter or oil
10 oz/284 g whole butter
2 fl oz/60 mL. lemon juice or lime juice
3 tbsp/9 g chopped parsley
Begin by blotting the trout dry and season with salt and pepper. Dredge in the flower.
Heat the clarified butter in a large saute pan over medium heat. Working in batches, saute the trout until lightly browned and cooked through, 3-4 minutes per side. Remove the trout from the pan and keep them warm while completing the sauce.
Decrease the pan and add the whole butter. Cook the butter over medium-high heat until lightly browned with a nutty aroma. 2-3 minutes.
Add the lemon or lime juice into the pan and swirl to deglaze it. Add the parsley and pour or spoon the sauce over the trout. Serve immediately and enjoy.
SHRIMP Southwind Ticin-Xic This recipe makes around 8 servings.
3 1/4 oz
GLOSSARY
- What is Deglazing in Cooking?
- Deglazing is a fundamental cooking technique used to capture and incorporate the flavorful browned bits (known as fond) that stick to the bottom of a pan after searing or sautéing ingredients like meat, vegetables, or onions. These bits are packed with concentrated flavors from the Maillard reaction—the caramelization process that creates rich, savory tastes—and deglazing dissolves them into a liquid to form the base of a sauce, gravy, or soup.
- Why Deglaze?The primary goal is to avoid wasting those delicious pan residues, turning what would otherwise be scraps into an umami-rich foundation for your dish. It’s especially useful for elevating simple meals, like turning pan-fried chicken into a quick pan sauce or enhancing a stir-fry with a glossy glaze.
- When to Use It–Deglaze after browning proteins (e.g., steak, chicken) or aromatics on high heat in a skillet, Dutch oven, or sauté pan. It’s common in recipes for reductions, gravies, or finishing sauces, but skip it if you’re baking or using non-stick surfaces where fond doesn’t form well.
- How to Deglaze: Step-by-StepRemove the main ingredients: After cooking your food (like searing a steak), transfer it to a plate to rest, leaving the pan on medium-high heat.
- Add liquid: Pour in about ½ to 1 cup of liquid per 2 servings—options include stock, wine, broth, vinegar, or water. It should sizzle and steam immediately, loosening the bits.
- Scrape the pan: Use a wooden spoon or whisk to gently scrape up the fond as it dissolves. This takes 1–2 minutes.
- Reduce and finish: Simmer until the liquid thickens slightly, then stir in butter, herbs, or cream for extra richness. Pour over your dish.
- Tips for Success– Use a hot pan but not smoking to avoid burning the fond.
- Acidic liquids like wine or lemon juice brighten flavors and cut through richness.
- This method is simple yet transformative, making professional-level sauces accessible at home.
- What is Clarified Butter?
- Clarified butter is butter that’s been melted and separated to remove the water, milk solids, and sometimes salt (if starting with salted butter). What’s left is pure butterfat, which has a higher smoke point (around 450°F/232°C) than regular butter (about 350°F/177°C), making it ideal for high-heat cooking without burning or splattering. It’s a staple in Indian cuisine (where it’s called ghee) and French cooking for sauces like beurre blanc.Why Use Clarified Butter?Higher smoke point: Perfect for frying, sautéing, or deglazing without the bitter taste from burned milk solids.
- Longer shelf life: Without water or solids, it stores at room temperature for months and resists spoilage.
- Nutrient-dense: Retains fat-soluble vitamins (A, D, E, K) and is lactose-free, so it’s suitable for those with dairy sensitivities.
- Flavor boost: It has a rich, nutty taste that’s more concentrated than regular butter.
How to Make Clarified Butter at Home
- Melt the butter: In a saucepan over low heat, melt 1 pound (4 sticks) of unsalted butter until it foams.
- Skim and strain: Let it simmer gently for 10–15 minutes. Skim off the foam (milk solids) from the top, then pour through a cheesecloth-lined strainer into a jar. Discard the solids at the bottom.
- Cool and store: It solidifies into a golden liquid that you can refrigerate for up to 6 months or keep at room temp.
- Store-bought versions are convenient, but homemade is fresher and cheaper.
- Clarified Butter vs. Oil
- If you’re looking for alternatives, neutral oils like avocado, grapeseed, or refined olive oil serve similar purposes in high-heat cooking:
- Similarities: Both have high smoke points (avocado oil: ~520°F/271°C) and won’t burn easily, making them great for deglazing or frying.
- Differences: Oil lacks butter’s creamy, nutty flavor—use it for neutral dishes. Clarified butter adds richness but is more caloric and animal-based. Opt for oil if you’re vegan or want something lighter.
- When to choose oil: For everyday stir-fries or when butter’s flavor would overpower delicate ingredients. In deglazing, swirl in a tablespoon of either at the end for gloss and depth—just don’t let it overheat. Experiment to see what suits your recipe!


Leave a comment